This Christmas I tried to get creative and make a few Christmas presents using chalk board paint.
The first thing I made was chalk board paint wine glasses. I thought this was a good idea because at get-togethers people are always misplacing their wine glass, mixing them up with another glass, etc. If you paint the base of the glass in chalk board paint, people can write their names on their glass with chalk!
Unfortunately, one of the wine glasses broke as I was packing them, and I ended up not giving them as a present. I can't give a set of 7 wine glasses! Either way, here is how I made them:
I poured the chalk board paint into an old tupperware container that I didn't mind throwing out when I was done. Then I dipped the base of the wine glasses into the paint, and twirled it around as the paint dripped off. This gave the base an even, paintbrush stroke-free look.
Then I just placed the wine glasses on parchment paper to dry. Every half hour or so I would move them around, just to make sure they didn't stick. It was so easy!
I also made a chalk board paint frame. I did this by applying two coats of the chalk board paint to the glass with a small roller.
This is very similar to the chalk board menu I have in my kitchen.
I found an antique silver tray at an antique store in Maine for a great bargain. I applied two coats of chalk board paint to the center using a small roller, and I used a brush to give it a smooth edge. After applying some silver polish, it turned out great! (These pictures are before the silver polish - sorry!)
I love the tray so much that it was actually hard to part with. I am going to have to keep an eye out for more trays, and make a few for myself! I can imagine it on my mantle saying "welcome" or resting on my corner cabinet saying "Let it Snow."
:-D
Showing posts with label chalkboard paint. Show all posts
Sunday, January 1, 2012
Chalk Board Paint Presents
Monday, September 19, 2011
Chalkboard Paint is Freaking Awesome
I have wanted to try out Chalkboard paint for a while. When I imagined the house I was going to buy, I secretly hoped that it would have the perfect wall to do floor to ceiling chalkboard paint, but alas the home I purchased didn't have a wall that would allow that.
I recently purchased two very cheap clay pots from Ikea (the total of both was less than $5 - I don't even want to imagine what they must pay their employees to be able to afford to sell their products for so cheap. I digress...).
I used Rust-Oleum Chalkboard paint.
I used a small sponge rolling brush to apply the paint. I also made sure to paint the top part of the inside, in case you can see inside the pot. I only needed one coat!
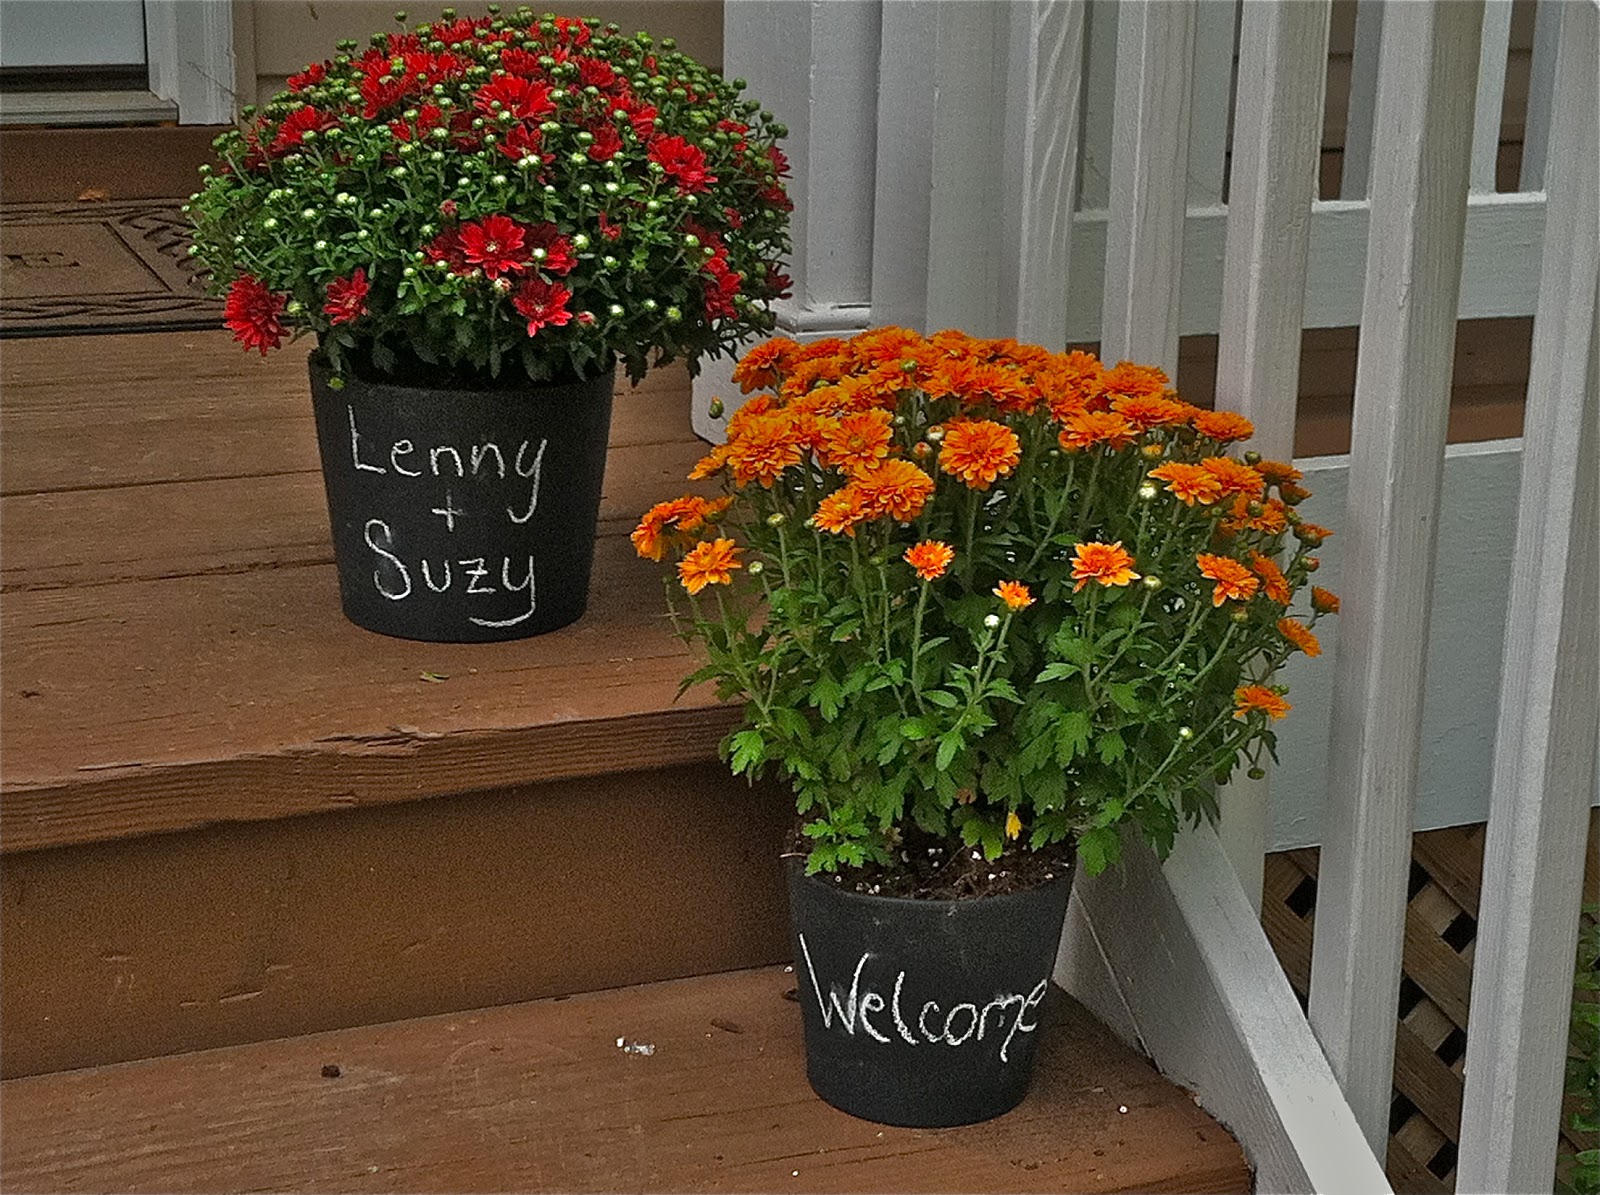
After letting them dry for three days, I dusted them with chalk to let it set and then I planted some mums in them. I put them on my front porch and wrote "Welcome" on one and "Lenny + Suzy" on the other for my aunt Suzy and her friend Lenny who came down to DC for a visit.
I have so many ideas of what I can do with these - such as "No." and my house number, like below. I can also do "Trick" and "Treat", or "Merry" and "Christmas." The possibilities are endless!
I had so much fun with this that I started looking around the house for other things I can use chalkboard paint on. One of the things I spotted was this jar that I use for dog treats.
Here is the before:
And here is the "after":
It says "Treats For Good Dogs" :-D
And of course, I can't talk about chalkboard paint without posting a picture of my Ms. Mustard Seed chalkboard!!! I love this!! I use it as a menu board in my kitchen.
I can't wait to find more things to use chalkboard paint on! (Family and friends be warned - chalkboard paint projects MIGHT turn into Christmas presents!)
(PS - I KNEW IT! Ikea isn't all smiles and sunshine after all!)
I shared this with:
Passionately Artistic's Linking Party
Saved By Loves Creations' Thrifty Thursday
The Shabby Creek Cottage's Transformation Thursday
I recently purchased two very cheap clay pots from Ikea (the total of both was less than $5 - I don't even want to imagine what they must pay their employees to be able to afford to sell their products for so cheap. I digress...).
I used Rust-Oleum Chalkboard paint.
I used a small sponge rolling brush to apply the paint. I also made sure to paint the top part of the inside, in case you can see inside the pot. I only needed one coat!
After letting them dry for three days, I dusted them with chalk to let it set and then I planted some mums in them. I put them on my front porch and wrote "Welcome" on one and "Lenny + Suzy" on the other for my aunt Suzy and her friend Lenny who came down to DC for a visit.
I have so many ideas of what I can do with these - such as "No." and my house number, like below. I can also do "Trick" and "Treat", or "Merry" and "Christmas." The possibilities are endless!
I had so much fun with this that I started looking around the house for other things I can use chalkboard paint on. One of the things I spotted was this jar that I use for dog treats.
Here is the before:
And here is the "after":
It says "Treats For Good Dogs" :-D
And of course, I can't talk about chalkboard paint without posting a picture of my Ms. Mustard Seed chalkboard!!! I love this!! I use it as a menu board in my kitchen.
I can't wait to find more things to use chalkboard paint on! (Family and friends be warned - chalkboard paint projects MIGHT turn into Christmas presents!)
(PS - I KNEW IT! Ikea isn't all smiles and sunshine after all!)
I shared this with:
Passionately Artistic's Linking Party
Saved By Loves Creations' Thrifty Thursday
The Shabby Creek Cottage's Transformation Thursday
Labels:
chalkboard paint,
flower pot
Subscribe to:
Posts (Atom)